
Fallen Lineage Catacombs Events and Choices
Last updated:
Catacombs choices affect the Red Lich, your alignment, party recovery, and the route ahead. Repair the seals for boss preparation, weigh the Red Ring's attack benefit against its boss buff, and use healing stops before taking tougher encounters.
Choose Fight them and mend the marks at The Broken Seals, defeat two Skeletons, then choose Mend it at The Third Seal. Completing all three seals gives the Red Lich an opening Stun for 2 turns and makes him rise at 15% HP. Taking the Red Ring grants Edge and Chaotic +1 but gives the boss opening Fortify for 3 turns; leaving it grants Lawful +1. For recovery, take the right door in Two Doors or choose a Camp node for 30% healing. At The Drop, Jump skips 2 steps.
Catacombs Route Choices
Choose a branch according to what your party needs next:
- Boss preparation: Follow The Broken Seals through The Third Seal to weaken the Red Lich.
- Attack benefit and alignment: Decide whether the Red Ring's Edge benefit is worth giving the boss opening Fortify.
- Recovery: Look for Two Doors, A Dry Tomb, or The Keepers' Hearth when the party needs healing.
- A shorter route: Choose The Drop to skip ahead.
- Equipment and rewards: Look for The Keepers' Trade, Grave Goods, or encounters with the reward tags you want.
Check the current card's danger, reward rating, and modifiers before committing. A recovery stop is a better choice than an Elite fight when your party is already struggling to stay alive. For shared card controls and party voting, use the events and route choices guide.
Catacombs Event Directory
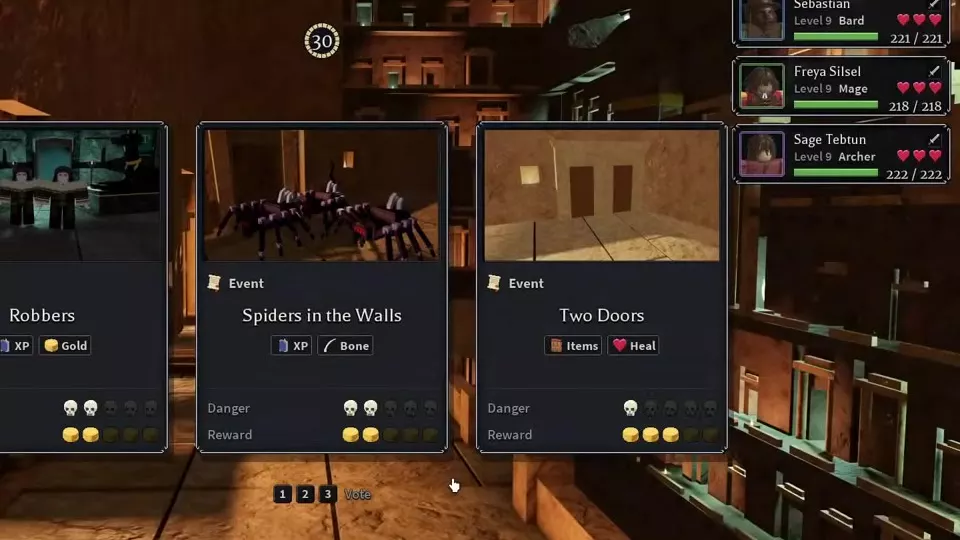
Compare reward tags, danger ratings, and reward ratings across the Catacombs nodes. Ratings retain their route-card conditions, including Normal difficulty where specified. Reward tags identify categories such as XP, Gold, Items, Bone, or Buff; they do not specify a payout amount.
Expand an event name for its branch conditions and outcomes. Connected seal nodes belong to the same route, so complete the follow-up choice to receive the boss effects.
Catacombs events, seal routes, recovery stops, encounters, and rewards.
26 objects
|
|
XP; Boss | 3 Example | 3 Example |
|---|---|---|---|
|
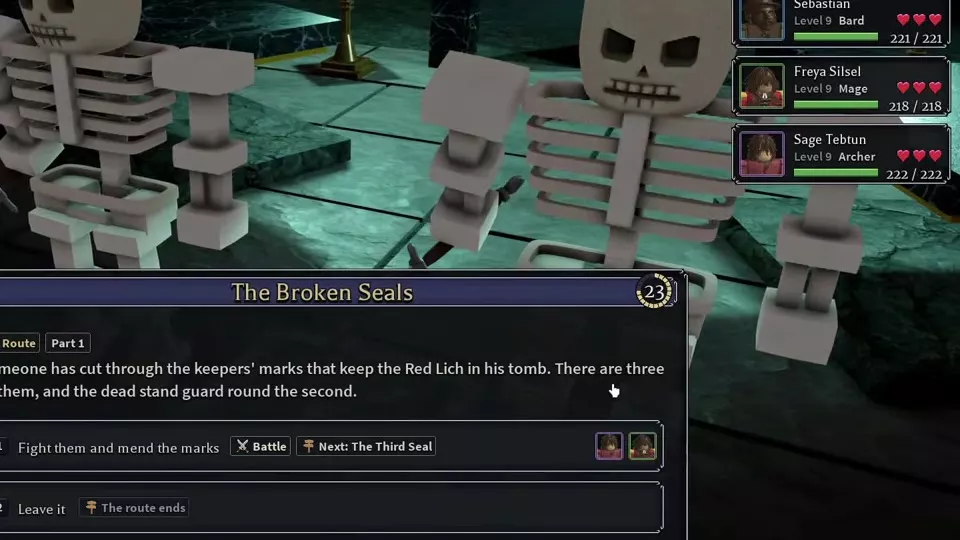
The first part of a route to repair the seals holding The Red Lich in his tomb. Fighting the dead guarding a damaged mark leads to The Third Seal.
TipsChoose Fight and mend at The Broken Seals, defeat the two Skeletons, then continue mending at The Third Seal. Completing all three seals gives the Red Lich Stun 2 at the opening and a rise at 15% HP. Prepare the rest of the encounter with the Red Lich combat guide. |
|||
|
|
Boss | — | — |
|
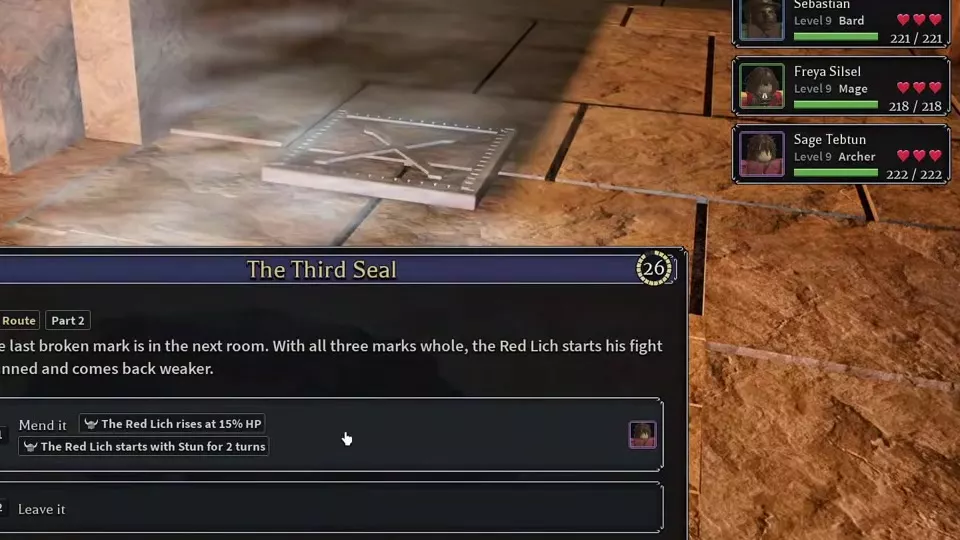
The second part of the seal route presents the last damaged seal. Mending it completes the seals and weakens The Red Lich.
|
|||
|
|
XP; Items; Bone | 4 Normal example | 4 Normal example |
|
A Catacombs route tagged for XP, Items and Bone. |
|||
|
|
Edge; Boss; Lawful; Chaotic | — | — |
|
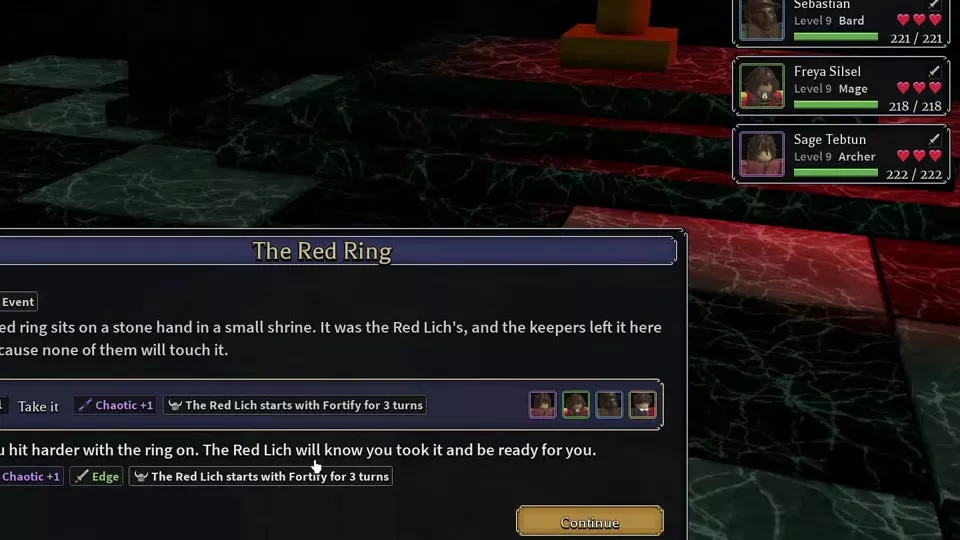
An event offering The Red Lich's ring from a stone hand on a shrine. Taking it strengthens attacks while granting the boss opening Fortify.
TipsTake the ring for Edge and Chaotic 1 while accepting the Red Lich's opening Fortify 3; leave it for Lawful 1. |
|||
|
|
Items; Heal | — | — |
|
A two-door event with a battle behind the left door and a healing room behind the right door.
TipsChoose the right door for Heal 30% when recovery is your priority. |
|||
|
|
Gold; Items; Lawful; Chaotic | 1 Normal route-card example | 3 Normal route-card example |
|
A trapped robber offers a map in return for help lifting a stone. The alternatives are taking his bag or walking on.
|
|||
|
|
Shortcut | 1 Normal route-card example | 1 Normal route-card example |
|
A shortcut event offering a jump through a broken floor or a longer route around it.
|
|||
|
|
XP; Bone | — | — |
|
A Catacombs event tagged for XP and Bone. |
|||
|
|
XP; Items; Bone | — | — |
|
A Catacombs event tagged for XP, Items and Bone. |
|||
|
|
Boss | 1 Normal route-card example | 2 Normal route-card example |
|
A Catacombs event with a Boss tag. |
|||
|
|
Items; Gold | 1 Normal route-card example | 3 Normal route-card example |
|
A Catacombs event tagged for Items and Gold. |
|||
|
|
— | — | — |
|
A camp that heals the party on entry and offers Go home or Continue.
|
|||
|
|
— | — | — |
|
A Catacombs camp offering healing and Go home.
|
|||
|
|
XP; Gold | 2 Example | 2 Example |
|
A Catacombs Fight node tagged for XP and Gold.
|
|||
|
|
XP; Gold | 2 Example | 2 Example |
|
A Catacombs Fight node tagged for XP and Gold.
|
|||
|
|
XP; Gold | 2 Normal example | 2 Normal example |
|
A Catacombs Fight node tagged for XP and Gold.
|
|||
|
|
XP; Gold | 3 Normal example | 3 Normal example |
|
A Catacombs Fight node tagged for XP and Gold.
|
|||
|
|
XP; Gold | 3 Normal example | 3 Normal example |
|
A Catacombs Fight node tagged for XP and Gold.
|
|||
|
|
XP; Gold | 3 Normal example | 3 Normal example |
|
A Catacombs Fight node tagged for XP and Gold.
|
|||
|
|
XP; Gold | 3 Normal example | 3 Normal example |
|
A Catacombs Fight node tagged for XP and Gold.
|
|||
|
|
XP; Gold | 2 Normal example | 2 Normal example |
|
A Catacombs Fight node tagged for XP and Gold.
|
|||
|
|
XP; Gold; Buff | 4 Normal example | 4 Normal example |
|
An Elite Catacombs encounter tagged for XP, Gold and Buff. The Normal four-player example contained three Keeper Guards.
TipsPrepare recovery for three guards under the 25% damage modifier, and account for each guard's Shell before using a heavy hit. |
|||
|
|
XP; Gold | 2 Normal example | 2 Normal example |
|
A Catacombs Fight node tagged for XP and Gold. The Normal four-player example paired a Mourner with a Skeleton.
TipsFinish the Mourner first, then move to the remaining Skeleton. Match damage types to each enemy's traits. |
|||
|
|
XP; Gold; Buff | 4 Normal example | 4 Normal example |
|
An Elite Catacombs encounter tagged for XP, Gold and Buff.
|
|||
|
|
Items | — | — |
|
A Catacombs shop offering equipment for Gold. Items have individual Buy buttons, and Continue leaves the shop.
|
|||
|
|
Gold; Items | — | 3 Route-card example |
|
A Catacombs Treasure node offering Gold and Items.
|
|||
Repair the Seals and Choose the Red Ring
Complete the seal route
- Select The Broken Seals, the Part 1 route.
- Choose Fight them and mend the marks. The dead guard the second of three damaged seals.
- Defeat the two Skeletons to reach The Third Seal.
- Choose Mend it to finish repairing all three seals.
With all three seals intact, the Red Lich starts his fight with Stun for 2 turns and rises at 15% HP. Choose this route when weakening the boss is your priority. Choosing Leave it at The Broken Seals ends the route; choosing it at The Third Seal leaves the final seal unrepaired.
For the Skeleton battle, use Holy damage: Unholy increases incoming Holy damage by 50%. Their Shadowborn trait reduces incoming Shadow damage by 50%, while Bloodless prevents Bleed and Poison. In a four-player seal-route battle, both Skeletons were Level 21 with 236 maximum HP each. Prepare for Pommel Strike's Stun pressure while clearing them.
The opening Stun is a seal-route effect. The Red Lich's Unshakable trait blocks ordinary Stun skills.
Take or leave the Red Ring
| Choice | Alignment | Your benefit | Boss effect |
|---|---|---|---|
| Take it | Chaotic +1 | Edge | Opening Fortify: 3 turns |
| Leave it | Lawful +1 | — | — |
Take it grants Edge, strengthening your attacks, while giving the Red Lich Fortify for his first 3 turns. Choose it for the attack benefit and Chaotic alignment if your party is prepared to fight through that opening defense.
Leave it grants Lawful +1 and avoids granting the ring's opening Fortify to the boss.
Recovery, Shortcuts, and Smaller Branches
Two Doors
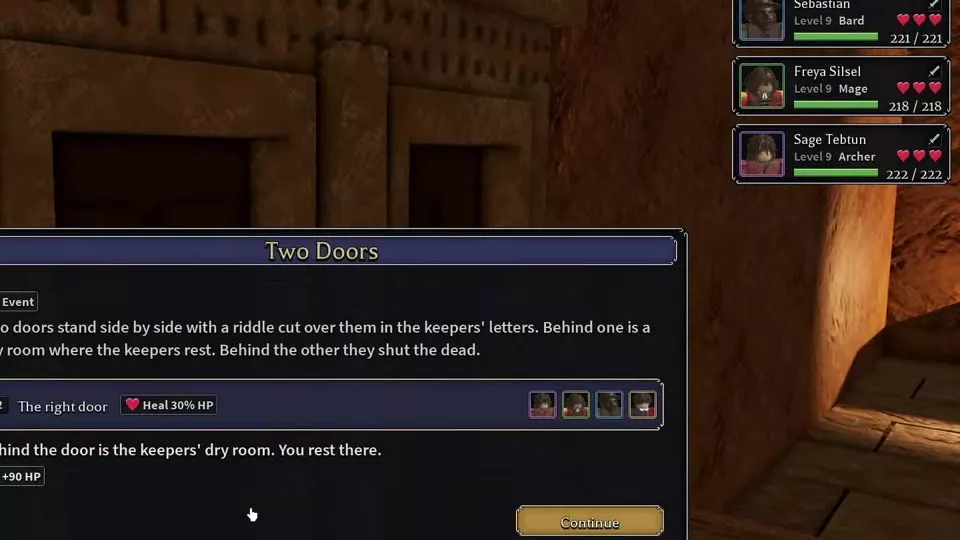
Choose The right door to enter the keepers' dry resting room and heal 30% HP, then select Continue after the result. The left door starts a battle.
With 300 maximum HP, one character recovered 90 HP, moving from 189/300 to 279/300.
A Dry Tomb and The Keepers' Hearth
Both are Camp nodes offering 30% healing and Go home. Prioritize one when the party needs recovery before another encounter.
At A Dry Tomb, healing occurs on entry. Afterward, choose Continue to advance or Go home to return home. The Keepers' Hearth also offers healing and a return-home option.
The Robber Under the Stone
Choose according to the alignment and branch you want:
- Lift the stone: Help the trapped robber, gain Lawful +1, and continue toward The Robbers' Map.
- Take his bag: Take the robber's money and gain Chaotic +1, leaving him trapped. In one Normal run, this choice awarded 39 Gold.
- Walk on: Leave the robber behind.
Select Continue after the result.
The Drop
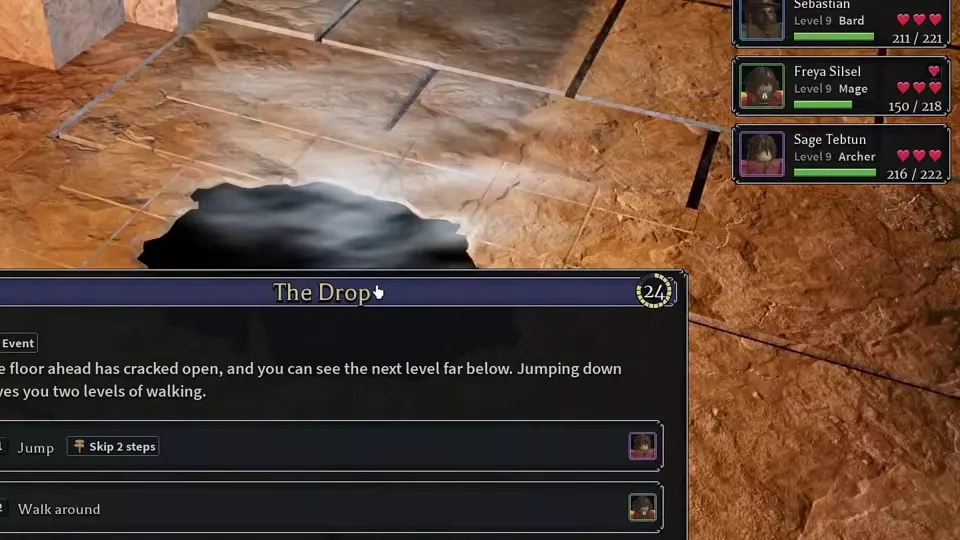
Choose Jump to skip 2 steps, or Walk around to take the longer route. Select Continue after the result.
Encounters, Shops, and Treasure
Keeper Guards
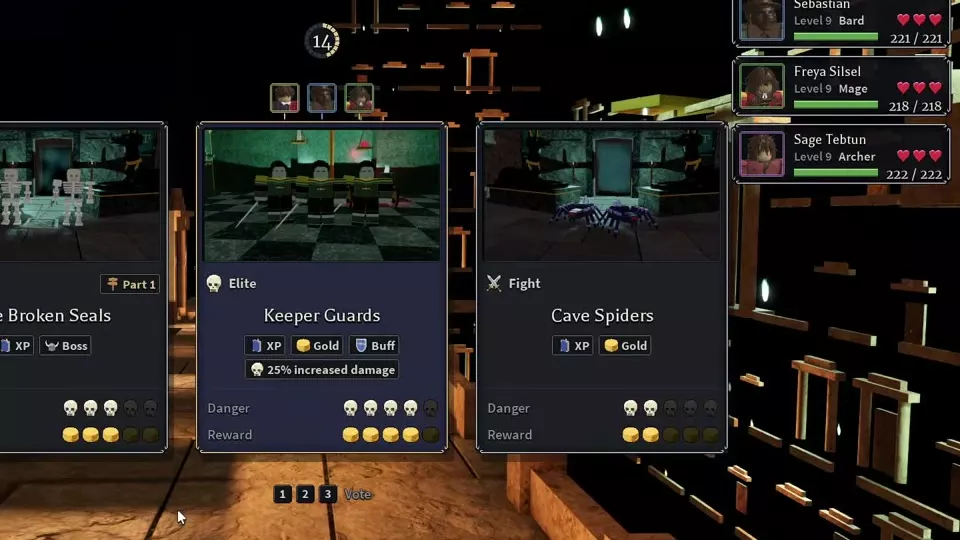
Keeper Guards is an Elite encounter tagged XP, Gold, and Buff. A Normal four-player encounter had danger and reward ratings of 4, a 25% increased enemy damage modifier, and three Level 23 guards with 462 maximum HP each. Check the current card's modifier before selecting it.
Focus one guard at a time. Each guard's Shell halves the damage of the first hit it receives each round, so use a smaller hit before spending a heavy attack on that target. Concentrated follow-up damage removes an enemy action sooner. Vulnerable increases damage taken by 25%, helping the party finish a wounded guard.
Keep recovery available for Lunge and Pommel Strike. Stun costs an action, and Steadfast blocks Stun, Freeze, Asleep, Fear, Silence, and Taunted while active. In the Normal four-player example, the fight lasted 12 rounds and one party member fell; the reward was 59 XP and 2 Gold. That is a substantial survival cost for the return in that run, so favor recovery when your party is already worn down.
A Mourner and the Dead
Focus the Mourner first, then finish the Skeleton. This Fight node is tagged XP and Gold, with danger and reward ratings of 2 in the Normal example.
The Normal four-player encounter paired a Level 21 Mourner with 172 HP and Frail with a Level 21 Skeleton with 236 HP, Bloodless, Unholy, and Shadowborn. Firebolt followed by Aimed Shot defeated the Mourner before the party concentrated on the Skeleton. The fight ended in round 3 in that example.
Use Holy damage against the Skeleton and retain direct damage from skills such as Aimed Shot; its Bloodless trait prevents the Bleed component from helping. The alternative The Guard and the Mourner was an Elite card with danger and reward ratings of 4, XP, Gold, and Buff tags, and a +20 Ward modifier.
The Keepers' Trade
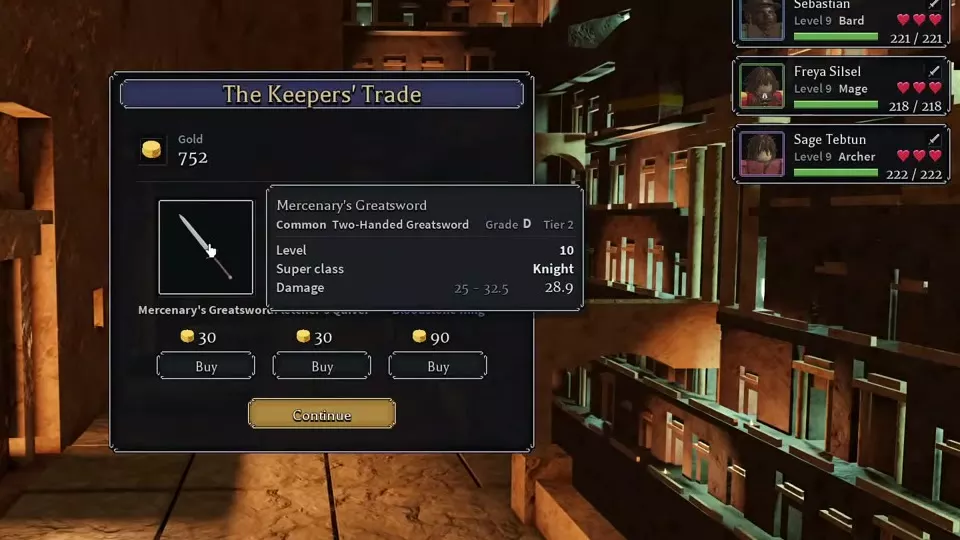
Inspect equipment before buying. Hover over an item to read its requirements and attributes, use the Buy button beneath it to purchase, or choose Continue to leave the shop.
One shop inventory offered:
| Item | Price |
|---|---|
| Mercenary's Greatsword | 30 Gold |
| Fletcher's Quiver | 30 Gold |
| Bloodstone Ring | 90 Gold |
The Mercenary's Greatsword in that inventory required Level 10 and Knight as its Super class. The Bloodstone Ring required Level 12. Check those requirements alongside the item's effects before spending Gold.
Grave Goods
Grave Goods is a Treasure choice tagged Gold and Items, with a reward rating of 3. Choose it for treasure when recovery is less urgent. If The Keepers' Hearth is offered alongside it and the party needs healing or a return-home option, choose the camp instead.
Prepare for the Red Lich
After choosing your route benefits, prepare sustained damage and healing for the boss and his two Skeletons. Clear the supporting enemies first and use Holy damage against the Red Lich's Unholy weakness. His Bloodless trait prevents Bleed and Poison.
- Red Lich preparation and combat: Handle the Skeletons, boss immunities, Burn pressure, and Drain.
- Enemies and matchups: Compare enemy traits and choose effective damage types.
- Weapons: Check weapon requirements and effects before buying or changing equipment.
- Armor and accessories: Compare defensive and accessory options for your role.
- Death, lives, and campfires: Plan recovery, continuing, and returning home.