
Fallen Lineage Party Composition and Turn Planning
Last updated:
A Warrior, Mage, Bard, and Archer party combines melee setup, spell damage, support, and ranged pressure. Make those roles work together by agreeing on targets and timing heavy attacks around buffs, enemy defenses, and control.
Assign Warrior to melee setup or protection, Mage to spell damage, Bard to buffs and control, and Archer to ranged damage. Apply Rousing Chord's Inspire before spending heavy attacks, use Lunge to establish Vulnerable, and concentrate enough damage to finish a target. Choose between preserving Vulnerable for damage and consuming it with Pommel Strike for Stun. When Lullaby is holding an enemy asleep, direct attacks elsewhere and keep Burn off that target.
A Four-Role Party
Use this four-player composition to cover distinct jobs:
| Class | Main job | Team contribution |
|---|---|---|
| Warrior | Melee setup or protection | Vulnerable setup |
| Mage | Spell damage | Direct damage and Burn |
| Bard | Buffs and control | Inspire and Lullaby |
| Archer | Ranged damage | Critical pressure or Slow |
Warrior opens damage opportunities with Lunge or takes a protection role with the appropriate build. Mage supplies spell damage and handles Thorny enemies without triggering their melee retaliation. Bard prepares the party's damage turns and holds selected enemies out of the fight. Archer chooses between finishing a target and applying Slow.
Before acting, name the focus target and identify any enemy the party intends to leave asleep. When several enemies share a name, specify their position. Assign one player to finish a wounded enemy and send the others toward a healthier threat instead of spending several strong skills on the same nearly defeated target.
Prepare Skills and Energy
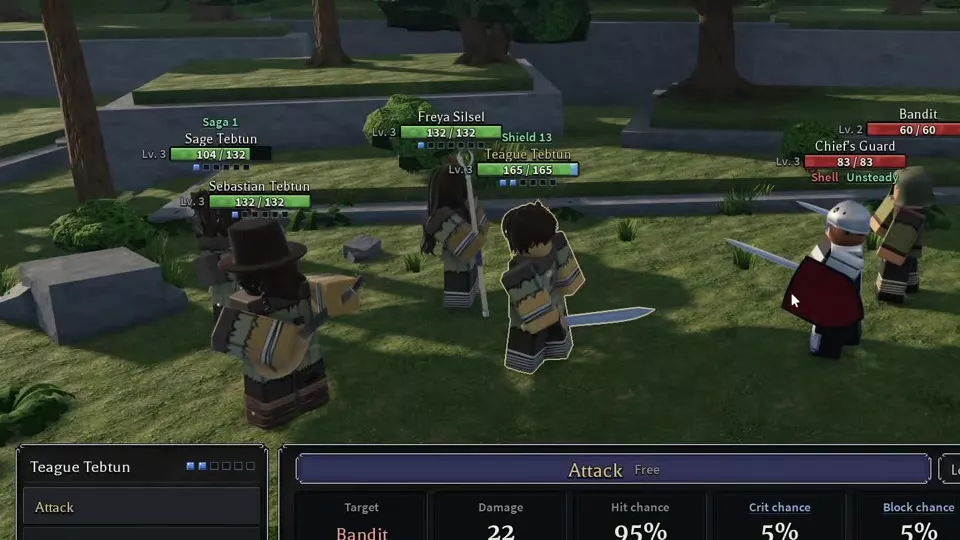
Equip the skills assigned to each role before departure. During combat, open Skills, check readiness and Energy, and select an enemy to read its target-specific preview.
- Attack: costs 0 Energy. Use it to finish enemies without spending resources or to contribute damage before Inspire is active.
- Focus: restores 2 Energy and consumes the character's action. Plan the enemy turns between recovery and the next attack.
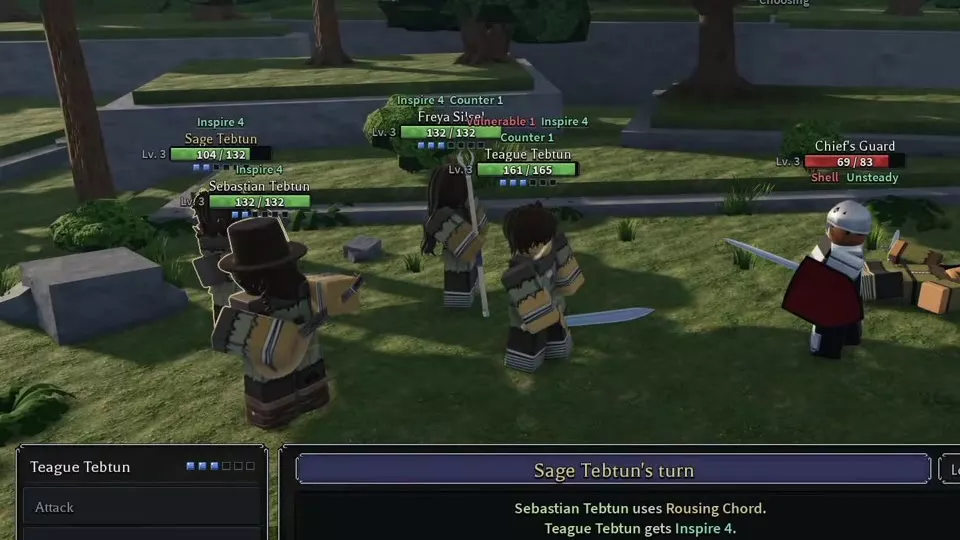
- Rousing Chord: costs 1 Energy and grants Inspire to the Bard and all allies. Inspire increases damage dealt by 20%; its basic effect lasts 2 turns. Sunsong Lute and Spiral Lute add Regen through their instrument effects.
- Lunge: costs 2 Energy, has a 0-turn cooldown, and applies Vulnerable for 2 turns. Its physical hit cannot be dodged, but block remains a separate defense. Vulnerable increases damage taken by 25%.
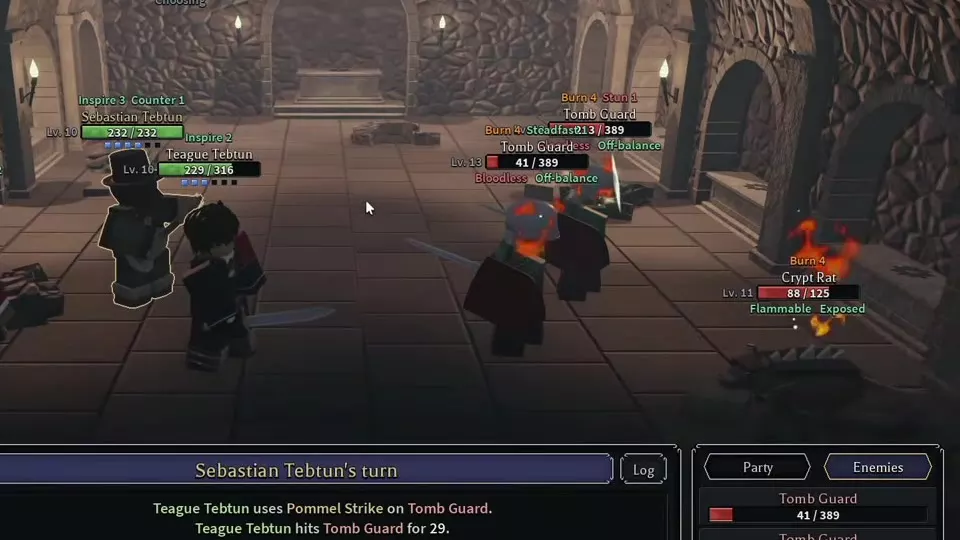
- Pommel Strike: costs 1 Energy and has a 1-turn cooldown. It applies Vulnerable for 1 turn to a target without it; against a Vulnerable target, it removes that status and applies Stun for 1 turn.
- Lullaby: puts a selected enemy Asleep. Choose its target together so the rest of the party can act without immediately breaking the control.
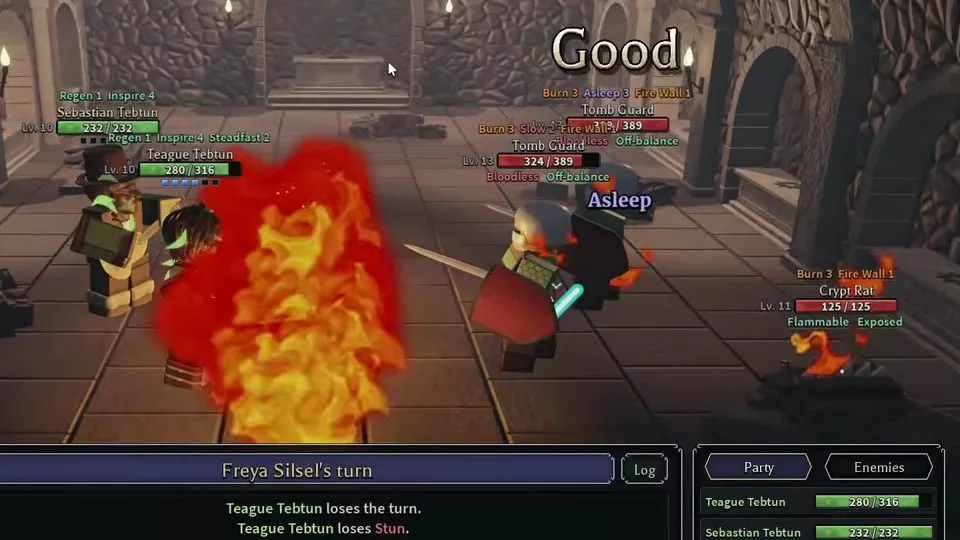
- Firebolt: delivers a direct hit and applies Burn. Fire Wall affects the enemy group for 3 turns and applies 5 Burn stacks through its melee-attack interactions.
- Aimed Shot: provides 75% more critical chance, a relative modifier rather than 75 percentage points. Dodge and block still apply. Pinning Shot deals damage and applies Slow.
Energy and cooldown are separate requirements. Pommel Strike marked Not ready yet remains unavailable even with enough Energy; Lunge's zero cooldown still requires its 2-Energy cost. For skill selection and the four-slot setup, use Skills and Loadouts.
Buff Before Committing Heavy Attacks
Read the upcoming turn order and build the plan around when each character actually acts. A damage dealer acting before Bard can use Attack and save Lunge for an inspired turn. If Energy is low and the party can withstand the intervening enemy actions, use Focus instead.
- Compare targets. Check projected remaining HP, hit chance, block chance, and traits. Assign an inexpensive finishing attack to a wounded enemy. Removing a supporting enemy reduces the number of enemies left to act.
- Establish Inspire. Have Bard use Rousing Chord before allies commit their stronger attacks when the turn order allows it. Check the active buff on the attacker before spending the skill.
- Account for Shell's first hit. Shell reduces the first hit against that enemy each round by 50%. Assign a lower-damage hit to consume that reduction before the stronger follow-up when the available actions allow it. Lunge also works as an opening setup hit when applying Vulnerable is the priority.
- Apply Vulnerable to the focus target. Use Lunge to prepare allied damage, then let the next attackers exploit the target's 25% increased damage taken. For Lunge's circular skill check, press Space as the rings meet.
- Finish, then redirect. Recheck HP after each action. Once Attack is enough to finish the enemy, reserve costly skills for another target.
For example, a Chief's Guard at 75 HP took 27 damage from Lunge, gained Vulnerable, and then fell to a 70-damage Firebolt. The useful sequence is the melee setup followed by a spell finisher; those damage amounts belong to that character-and-target setup.
Match assignments to defenses as well as HP. Thorny reflects True damage from melee hits, with the retaliation increasing with enemy level. Let Mage handle that target when the party has a suitable spell available.
Choose Damage or Control
Preserve Vulnerable or convert it to Stun
Keep Vulnerable active when allies are about to land useful damage and the target does not need an immediate interruption. Spend it with Pommel Strike when denying the enemy's action is worth giving up the remaining damage amplification.
Inspect immunity before choosing the combo. Pommel Strike consumes Vulnerable even when the target is immune to Stun. Against an Unshakable enemy, preserve the damage setup: that trait prevents Stun, Freeze, Asleep, Fear, Silence, Taunted, and Slow. Also check for Steadfast after Stun, Freeze, or Asleep ends; it grants immunity to Stun, Freeze, Asleep, Fear, Silence, and Taunted.
Other traits change the decision:
- Off-balance: a single hit reaching 15% of the enemy's maximum HP triggers a 1-turn Stun. Favor a sufficiently strong hit when that threshold offers both damage and control.
- Unsteady: Stun, Asleep, Fear, Silence, and Slow last 1 additional turn on the enemy. Use that longer control window when an applicable immunity does not block it.
Preserve sleep or spend it on a hit
Use Lullaby on an enemy the party will leave alone, preferably before its upcoming action. Name that target and concentrate attacks elsewhere. Any damage wakes an Asleep enemy, including Burn, so coordinate Firebolt and Fire Wall with Bard's target choice.
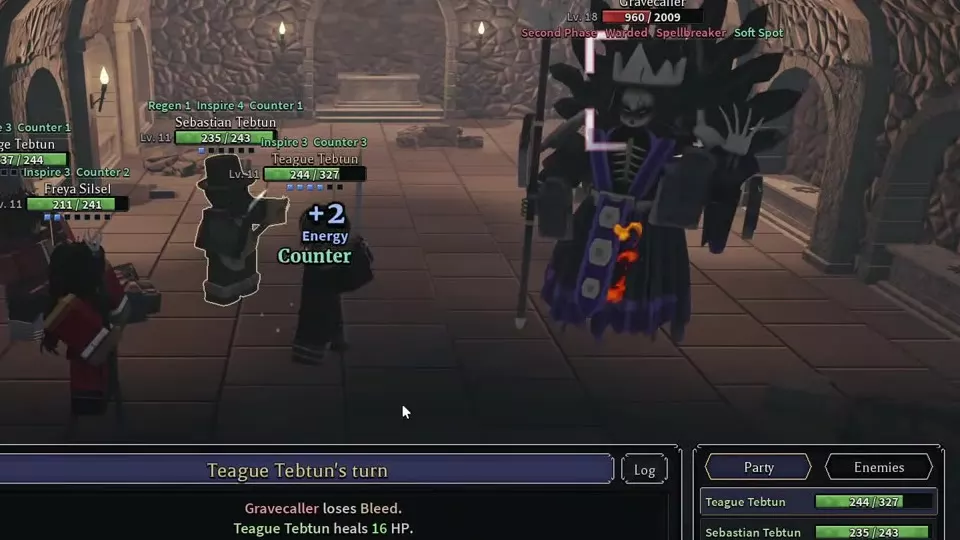
Sleep also creates an offensive opening: a hit against an Asleep enemy is a guaranteed critical hit that cannot be dodged or blocked. Choose deliberately between keeping that enemy inactive and waking it with a strong attack. In one Gravecaller fight, Aimed Shot dealt 227 critical damage to the sleeping boss, reducing it from 585 to 358 HP and ending sleep.
A Perfect Lullaby skill check does not bypass status resistance. If the target resists, continue with the party's damage or recovery plan instead of treating it as safely controlled.
Give Archer a specific job
Choose Aimed Shot when damage or a finishing hit is the priority. Choose Pinning Shot when Slow addresses the current threat and the target can receive it.
When Unguarded is active, agree on who will consume it. The next hit is a guaranteed critical hit that cannot be dodged or blocked, and consumes the effect. Unguarded activates once per round on the same enemy, so assign that opening to a useful heavy hit rather than an unnecessary finishing tap.
Recover Without Breaking the Plan
Use the turn order to decide who can afford a recovery action. If a damage dealer is short on Energy before Bard's buff turn, Focus prepares the next attack while Bard establishes Inspire. If a free Attack can remove an enemy immediately, take that opportunity before giving it another turn. The combat guide explains target previews and action timing in detail.
Coordinate HP recovery with the protection role. Sunsong Lute grants Regen for 3 turns, while Spiral Lute adds Regen 3 when applying Inspire. Regen restores 5% of maximum HP at turn start. With Lightsworn, Bard also grants Fortify when giving Regen, adding protection to the support cast.
Prepare the protector's recovery before adding Martyr. It redirects 25% of allies' damage to its user and provides 20% damage reduction, but reduces healing the user applies to themselves by 50%. That self-healing penalty makes recovery supplied by a teammate valuable when the protector takes shared damage.
With Lie in Wait, Focus also grants 1 Counter. A melee hit triggers an Attack in return and consumes 1 Counter; an enemy hit by that counterattack receives Taunted for 1 turn. Include that conditional benefit when planning a recovery turn.
Treat Echo as a timing tradeoff. It adds an echo at 35% Power and increases the skill's cooldown by 1 turn. At the repaired Gemcutter, select the intended skill and use the compatibility filter before choosing it. Favor Echo when the added cooldown fits the party's plan; keep a shorter cooldown when the next use matters more. See Gemcutter and Skill Gem Compatibility for the facility setup.
Party Setup and Role Builds
- Multiplayer rooms, invites, and voting: create or join the same party, choose the destination, and depart together.
- Bard support build: combine instruments, support nodes, Regen, and control.
- Warrior and Knight tank support build: build the recovery and defenses needed for protection and shared damage.
- Archer critical build: prepare Aimed Shot with critical modifiers, target statuses, and compatible gear.